Overview
This foundation workshop is the practical starting point for the microcontroller pathway. Students learn what an Arduino-compatible board is, how a sketch is structured, and how to verify that hardware, cable, drivers, board selection, and upload settings are working.
The session stays deliberately simple: one board, one LED, one upload loop, and a short troubleshooting checklist. ESP32 can be shown as an extension board, but Arduino Uno or Nano-compatible hardware should remain the default for classroom delivery.
Learning Outcomes
- Identify the main parts of an Arduino-compatible board and connect it safely by USB
- Select the correct board and port in the Arduino IDE
- Upload and modify the Blink sketch
- Use a simple checklist to diagnose failed uploads
What You Build
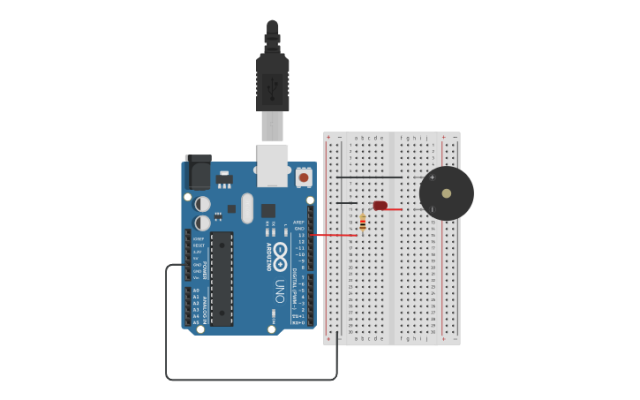
A verified Blink sketch controlling the onboard LED and, optionally, an external LED on a breadboard.
Materials Provided
Arduino Uno or Nano-compatible board, USB cable, breadboard, LED, 220 ohm resistor, jumper wires, Arduino IDE setup guide, upload troubleshooting checklist.
How Schools Can Integrate It
Use this as the first lesson in a STEM club, ICT practical, or maker-space induction. It gives teachers a quick way to confirm that student laptops, boards, USB cables, and classroom kits are ready before moving into sensors or robotics.